I spend a lot of time outdoors in the spring and summer with the kids and I'd been looking for a good way to exercise while they play in the yard when I stumbled upon
this youtube video of a girl hula hooping, and appearing to have a great time while doing it. As I stared in amazement I wondered HOW she did it. I mean, I've never been able to keep a hula hoop up and moving. I remembered a friend of mine having talked about making hula hoops so I got chatting with her about it, and soon found that the key to hula hooping was in having a decent hoop to work with rather than one of those cheap light-weight hoops from department store toy sections.
After a trip to her house, and some test drives of her hand made hoops over coffee and laughs she gave me the low down on how to make my own usable hula hoops. After acquiring all the materials we needed we spent yesterday afternoon making our own, so I'll share with you our experience.
First you want to get your materials together.
We got our
irrigation hose ($17.47), as well as our
couplers ($.38/each) at Lowe's. Those are the two necessities, but we also found a few huge spools of ribbon, and some black electrical tape at our local discount store, Marden's, for really cheap to decorate our hoops with.
 |
| 100ft. 3/4 in irrigation tubing |
 |
| 3/4 in tubing couplers |
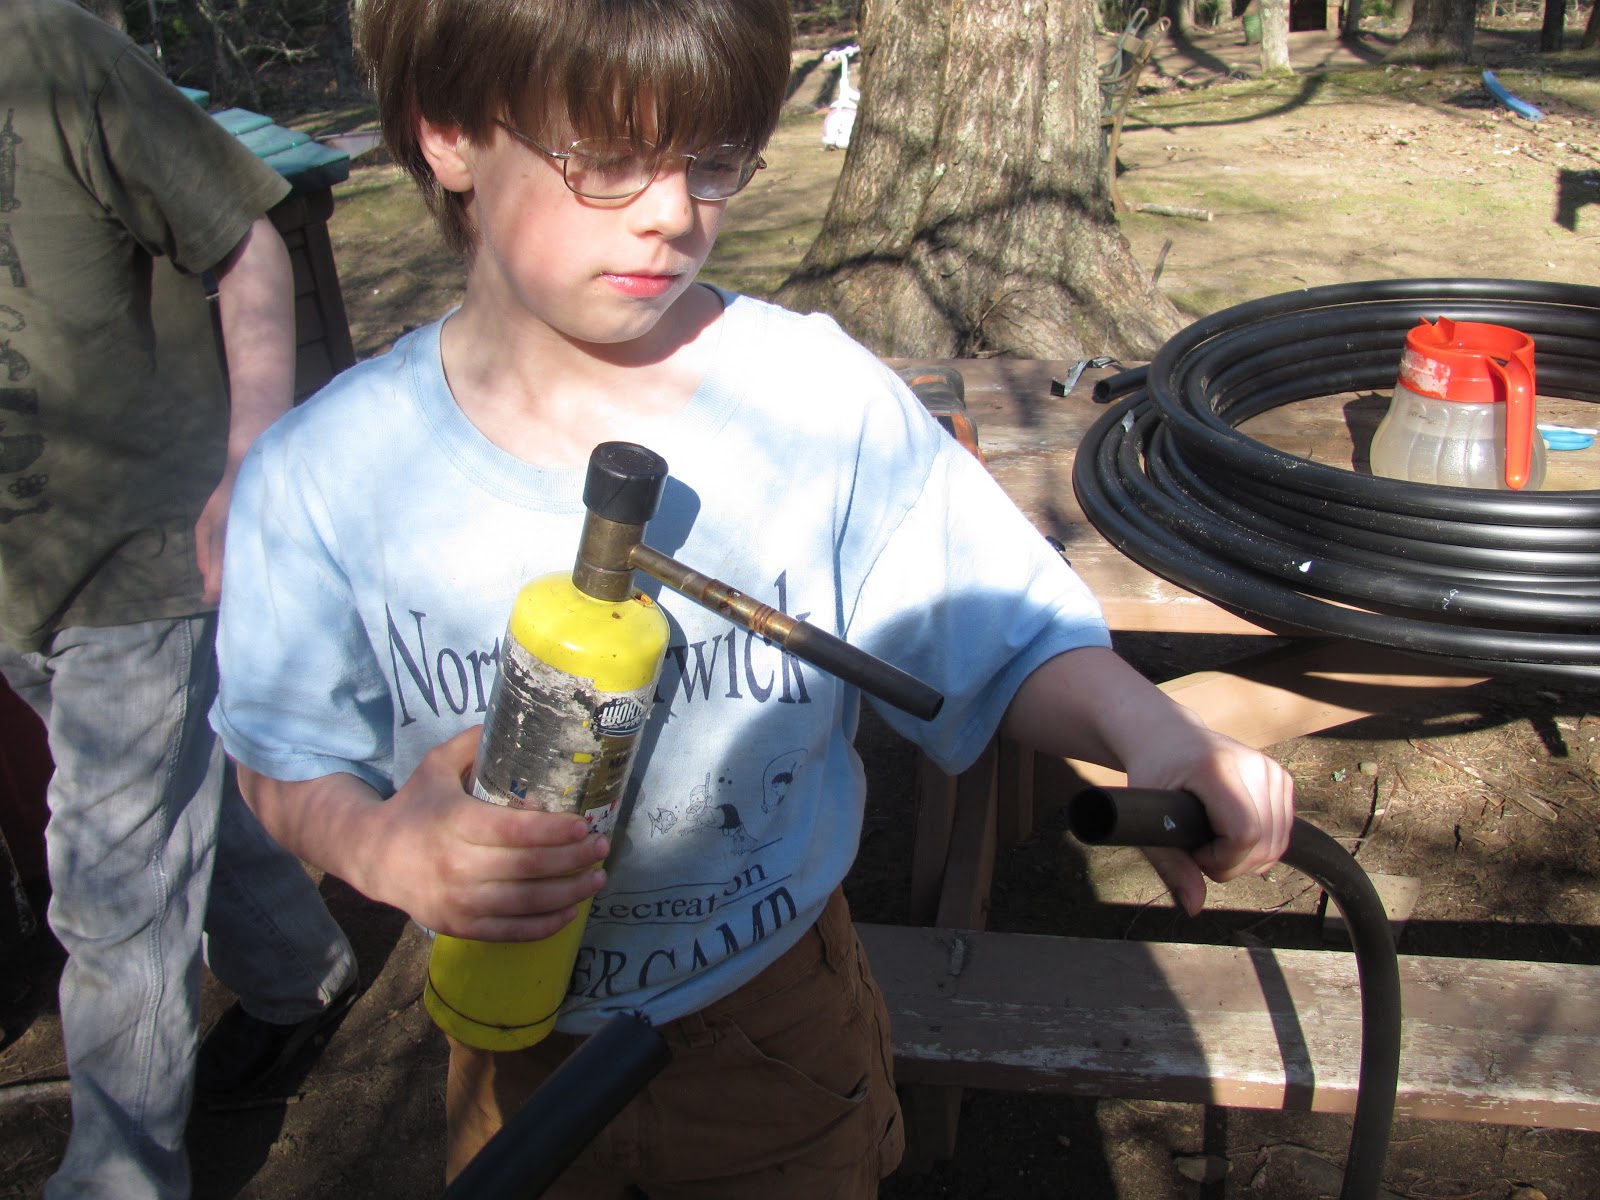
My hula hoop making friend told me to use a hack saw to cut the tubing and a bowl of hot water to soften the plastic before coupling it, but out here in the woods we tend to amp things up a bit so my welder neighbor lent me his skill saw and my landscaper boyfriend gave me his torch (apparently that's what they use when they are installing irrigation systems, go figure).
 |
| Skill saw and torch to cut and soften the plastic |
If you've read my blog before you already know I'm not really big on measurements, so I eyeballed the circumference I wanted for my hula hoop and cutting that length of tubing. We also decided to weight some of the hula hoops by adding water (somewhere between a half a cup and a cup) to the tubing before coupling the two ends together.
 |
| adding water to the tubing (can you tell the toddler is begging to let him do this job?) |
After adding the water we heated the tubing up using the torch, when it made the plastic shiny that indicated it was soft and pliable enough to couple together easily.
 |
| my little man demonstrating how and where to use the blow torch (no worried, the torch was OFF for demonstration purposes). |
Once the plastic had been heated we slid the coupler into one end of the tubing, and then the other, completing the circle. As you can see from the photo, my cut wasn't very clean and left a gap when coupled together. We remedied this with the black electrical tape we had to make it a smooth connection. Once the plastic cools it tightens back up on the coupler, sealing it tightly.
 |
the coupled tubing
|
After completing the hula hoops we decorated a few of them (and we still have some waiting to be decorated) with the ribbon we got on sale. We taped one end near the coupling and spiraled tightly around the tubing until the ends met up, and then took an alternating color and did the same thing in the gaps naturally created in the spiraled ribbon on the tubing which gave the appearance of alternating colors on the edge of the hoop. I also took the electrical tape and spiraled it around between the ribbons so it held down every other edge (though I could have done twice and gotten every edge) which seems secure and hasn't loosened even though we played with the hoops all yesterday and today.
 |
| ribbon and electrical tape pattern on tubing |
 |
| Thing 1 showing off the completed project |
 |
| Add caption |
 |
| giving it a whirl |
 |
practicing some new moves
|
 |
The boys showing off their new creations.
|
And, just as a warning.....if you happen to be knee high to a grasshopper, and your face is right at the same height as mama's waist, DON'T do sneaking up on her while she is attempting to hula hoop because this is what happens.....
 |
Don't let the tears fool you, he was already finished crying, he just started up again when he realized I was making him come inside (big surprise, this is the little Heffalump that wakes up screaming "ME GOOOOOO OOOUUUTTT!!!!")
|
I hope you enjoyed our little adventure creating out own hoops. Let us know if you try it out too.